How to revive your bricked Sierra Wireless EM7345
When playing with some EM7345 AT commands I was able to permanently bring the device down. Yes, THERE IS at least one AT command that can brick your EM7345 beyond repair! But not anymore, I found a way to revive a bricked EM7345 back to normal.
I’m going to publish some interesting information about that AT command in one of my following posts, as it’s really worth it, since it’s related to the infamous Carrier IQ scandal. Hey Intel, are you spying on us too?
But first things first, now I’m going to explain how to get your bricked EM7345 back to normal.
The method described in this post is only applicable to EM7345 devices installed in Lenovo laptops! Lenovo tablets have another hardware subtype of EM7345 and the firmwares for laptop and tablet are not mutually compatible! Don’t ever try to crossflash!
This method is only applicable for the symptoms described below. If your circumstances are different, don’t try this method!
Sometimes your EM7345 can die with the following symptoms:
- The device “Sierra Wireless EM7345 4G LTE” is not shown in Device Manager.
- AT COM ports and GNSS sensor device are not shown in Device Manager.
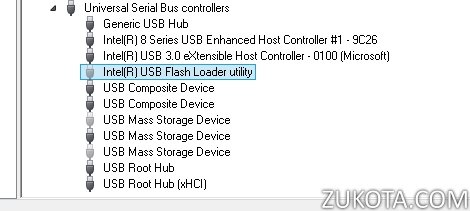
- Instead, a new USB device, named “Intel(R) USB Flash Loader Utility” is shown in Device Manager.
- The above device is constantly disappearing and reappearing again, and Device Manager is “refreshing” on its own every 2-3 seconds.
- Intel Firmware Updater doesn’t recognize the device at all and you can’t flash it.
- Rebooting, detaching the battery, removing the EM7345 from the laptop, enabling or disabling that Intel USB device.
- in Device Manager doesn’t help. The device is not recognized by Windows, you cannot use it anymore.
Bricked for good, you say?. But, there’s a way now.
Download and unzip the following file: FlashTool
Go to the unzipped folder and run “FlashTool_E2.exe”.
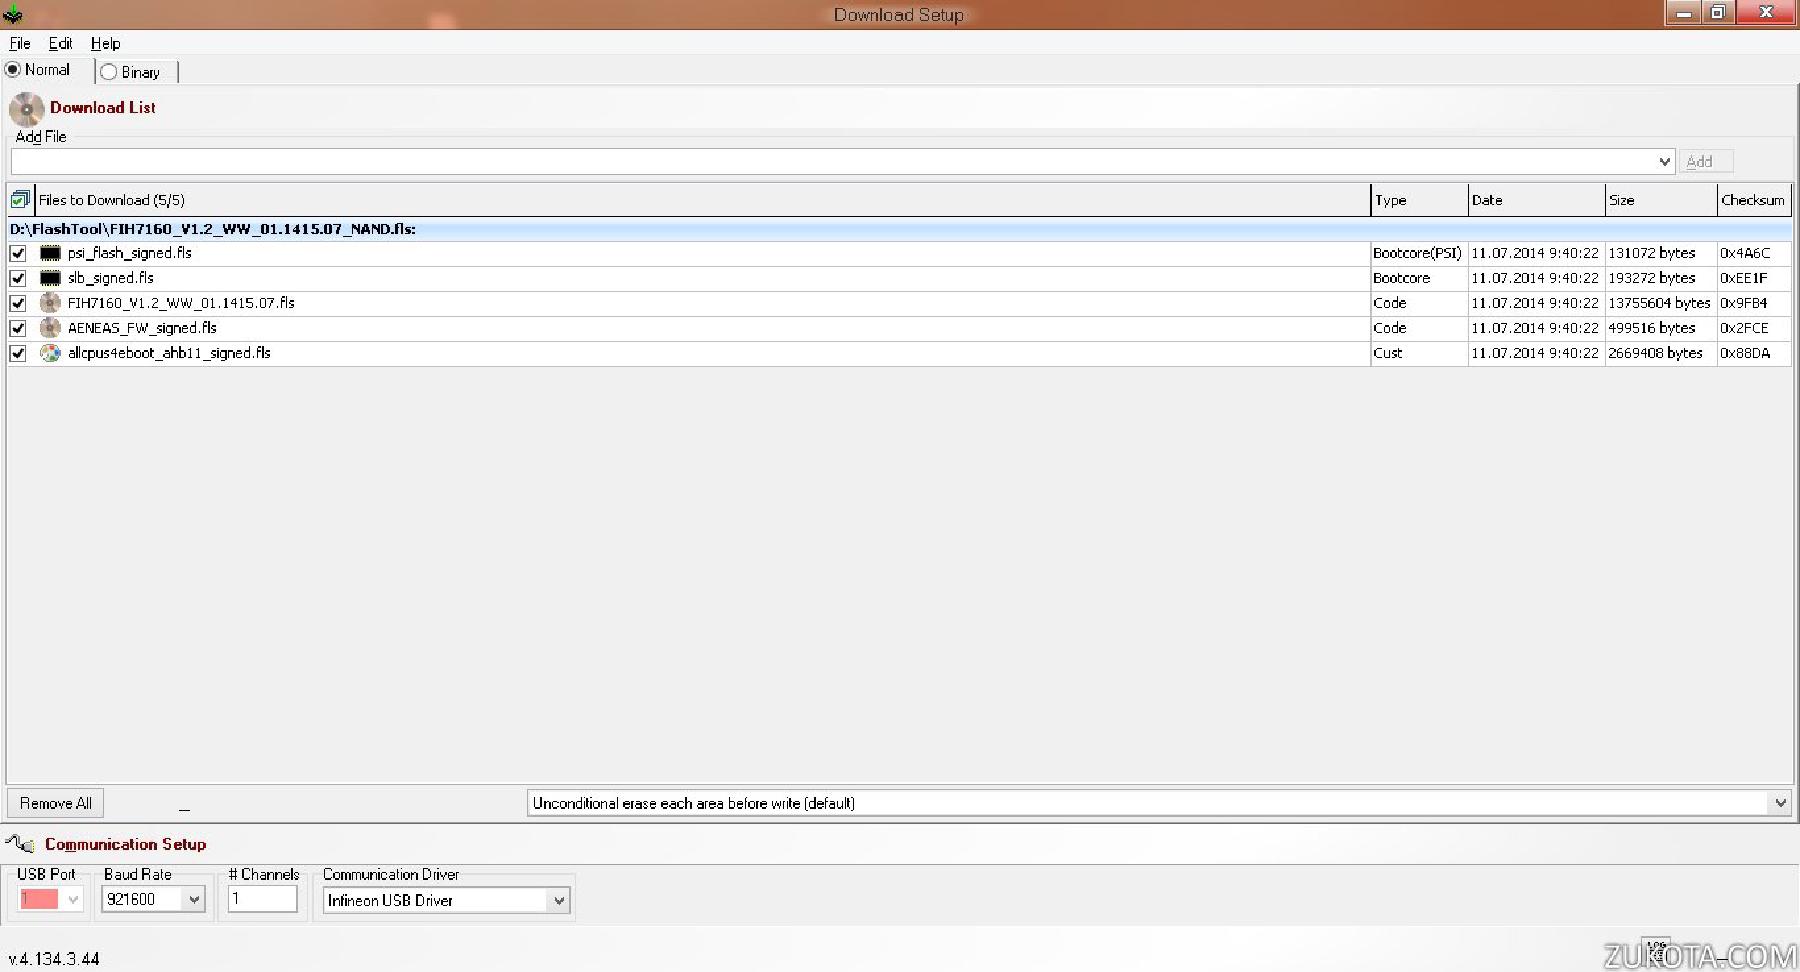
Press “Add” button and find a correct firmware file for your EM7345. On the picture above, I’m using 1415.07 firmware, you can also use 1415.09 or any other firmware. The firmware must be in FLS format! You can find EM7345 FLS firmwares in the folder “c:\ProgramData\Intel\MBIM Toolkit\FirmwareDatabase\PreInstalled” if you have Lenovo drivers installed.
Set everything as shown on the picture. All ticks, baud rate, channels, communication driver, especially erase settings!
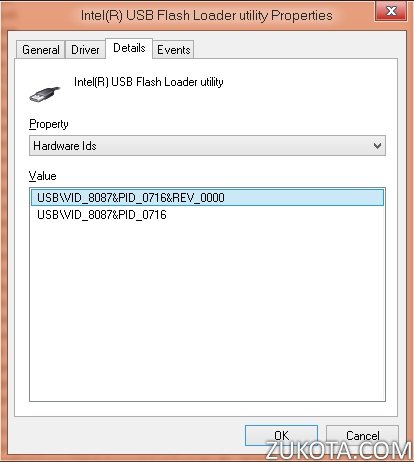
Then notice the VID and PID of that Intel USB device in Device Manager.
The VID is 8087 and PID is 0716 here.
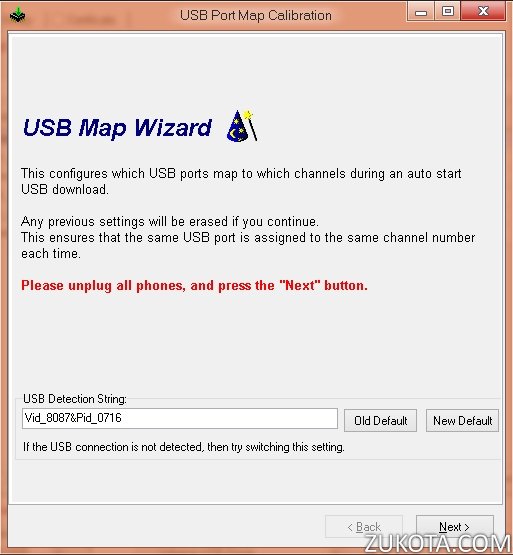
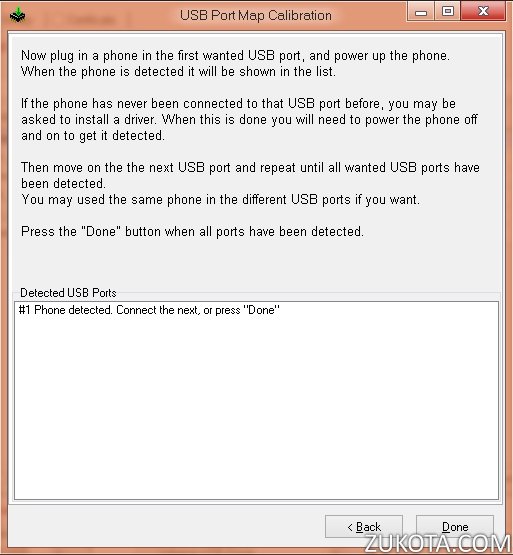
Open Flash Tool E2 File-> USB Map Wizard:
Make sure USB Detection String has the same numerical IDs as your Intel Flash Loader USB device in Device Manager! Correct it if necessary, and press Next button. The next time Device Manager “refreshes” itself, the device will be shown in the list as Detected. Press Done button.
Now, you’re ready. Double check all the settings in the Flash Tool and press Next button. It will show the following window:
All you have to do now is just press “Start USB1” button. In a few seconds your Em7345 will be recognized, erased and then reflashed. After it’s done you should see a message that all went well and completed 100% without errors. Then you can check again in Device Manager and make sure that Intel USB Flash Loader Utility is shown steadily and is not disappearing like before. Device Manager should not also constantly “refresh” itself. If it’s so, just turn off your Lenovo laptop now and disconnect the power cord. The idea here is to power off EM7345 completely.
Next, power on the laptop again and your EM7345 should be back up and running as before. It will be shown in Device Manager, AT ports will be back, so will be the GNSS sensor.
Congrats, you just revived your bricked EM7345!
And sometimes, it’s necessary to reflash your newly restored EM7345 again, using Intel Firmware Updater this time. This is needed when you get odd connection errors or AT+XLOG showing lots of errors. Intel Firmware Updater accepts only FLZ files, not FLS, so make sure you do it accordingly. Refer to this post for instructions. After I reflashed my EM7345 the second time, I saw no more errors added to AT+XLOG error log.

